Train
Important
Before you can create a new train, at least one proposal must already exist created by you or someone else in your organization. Otherwise, one must be created first here.
A Train is an analytical unit that will be run on target data requested in a proposal. It is submitted by a user, who includes information on its data usage, its analysis pipeline and other related contents. Trains are created and submitted for review within the Central App, then build, encrypted and send on their way to the stations as docker containers. Upon arrival and decryption of the script at a local station it may be reviewed one last time, before allowed access to the data for analysis. Afterwards the train will be sent to the next station, ultimately returning it to the user, who may decrypt the results of their analysis.
In the Home section press Trains in the menu on the left-hand side. At first, you will lead to the outgoing-trains section, where you can see a list of all the trains created by this realm. Via the searchbar you can filter after the name. You have the option to view configuration details of already existing trains via the List-icon or to delete the train via the bin-icon. You can also view a drop-down menu of the train's current state by clicking the Arrow-down-icon.
Moreover, you have the option to switch to the incoming section or to create a new train on the left side between the menu and the overview-list.
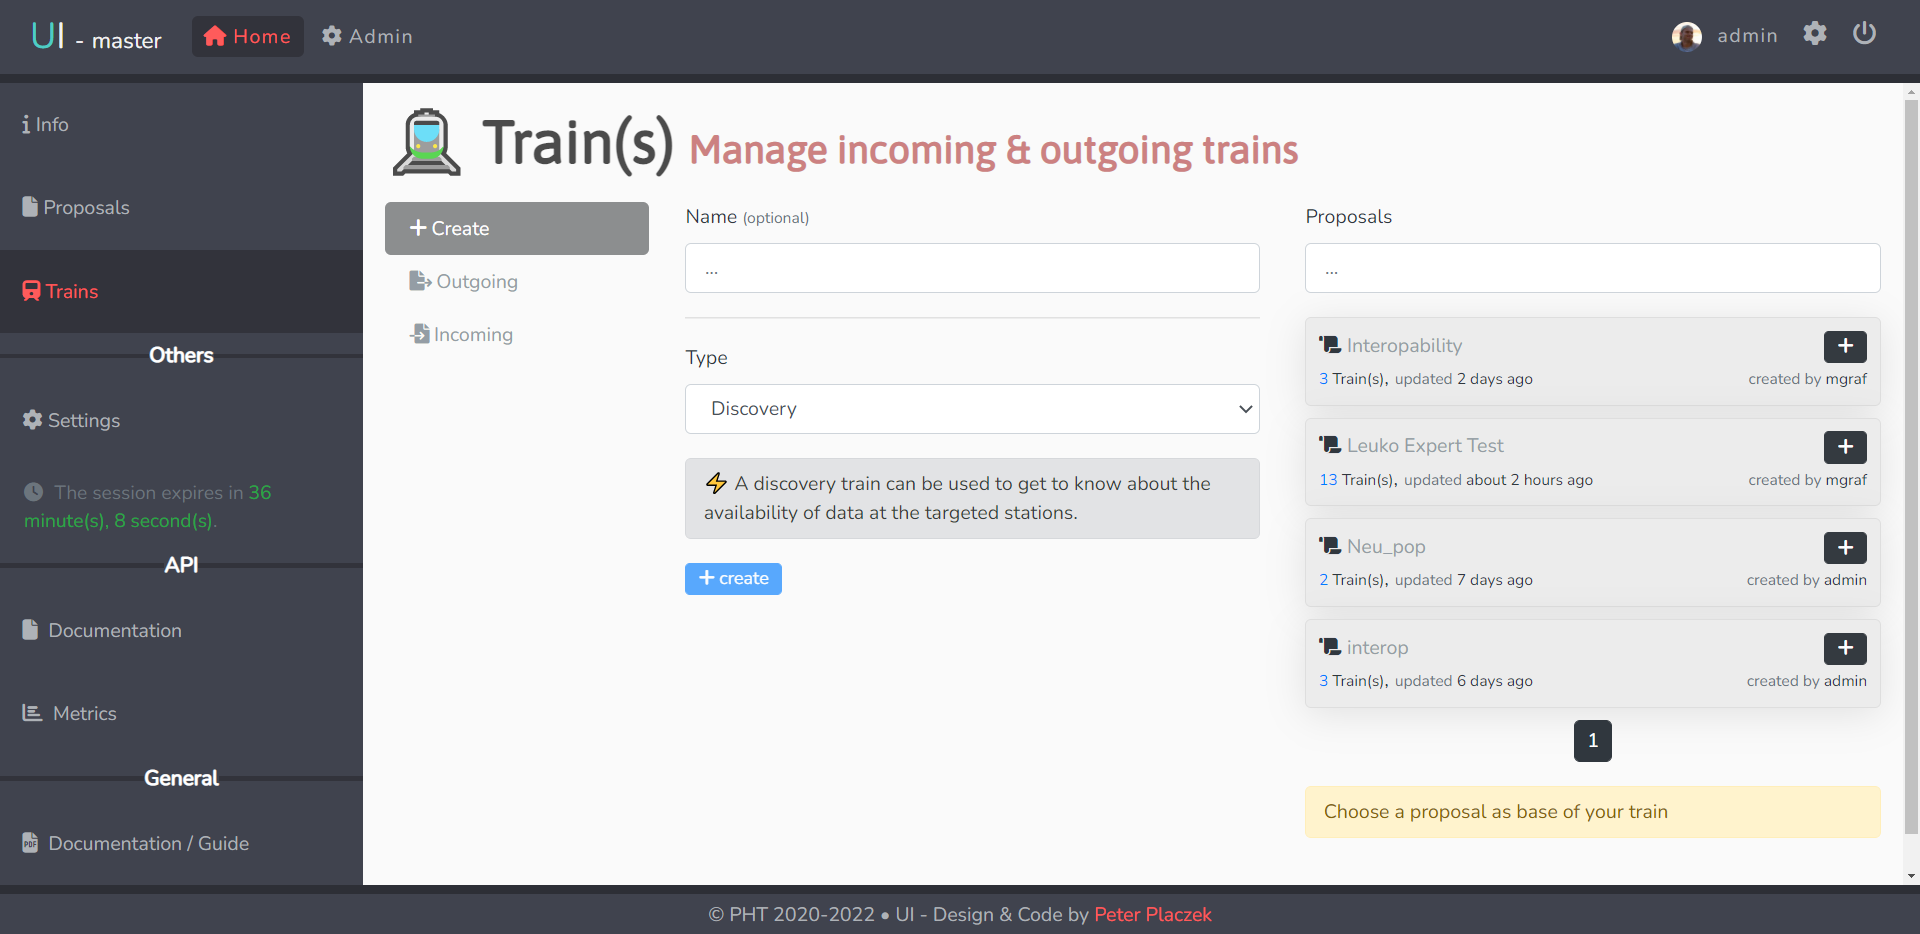
Creation
In the Home section you can choose Trains in the menu on the left-hand side. You will lead to the Outgoing page where you can switch to the creation form via the Create button inbetween the menu and the overview-list.
Define pre-parameters of the new train
On this page you can define:
an optional name for the given train.
which type of train you want to create. There are two options:
- Discovery: A discovery train can be used to get to know about the availability of data at the targeted stations.
- Analysis: An analysis train should be created on base of the knowledge achieved during the discovery phase.
to which proposal the train is associated. Only one proposal can be selected.
Click on create to continue.
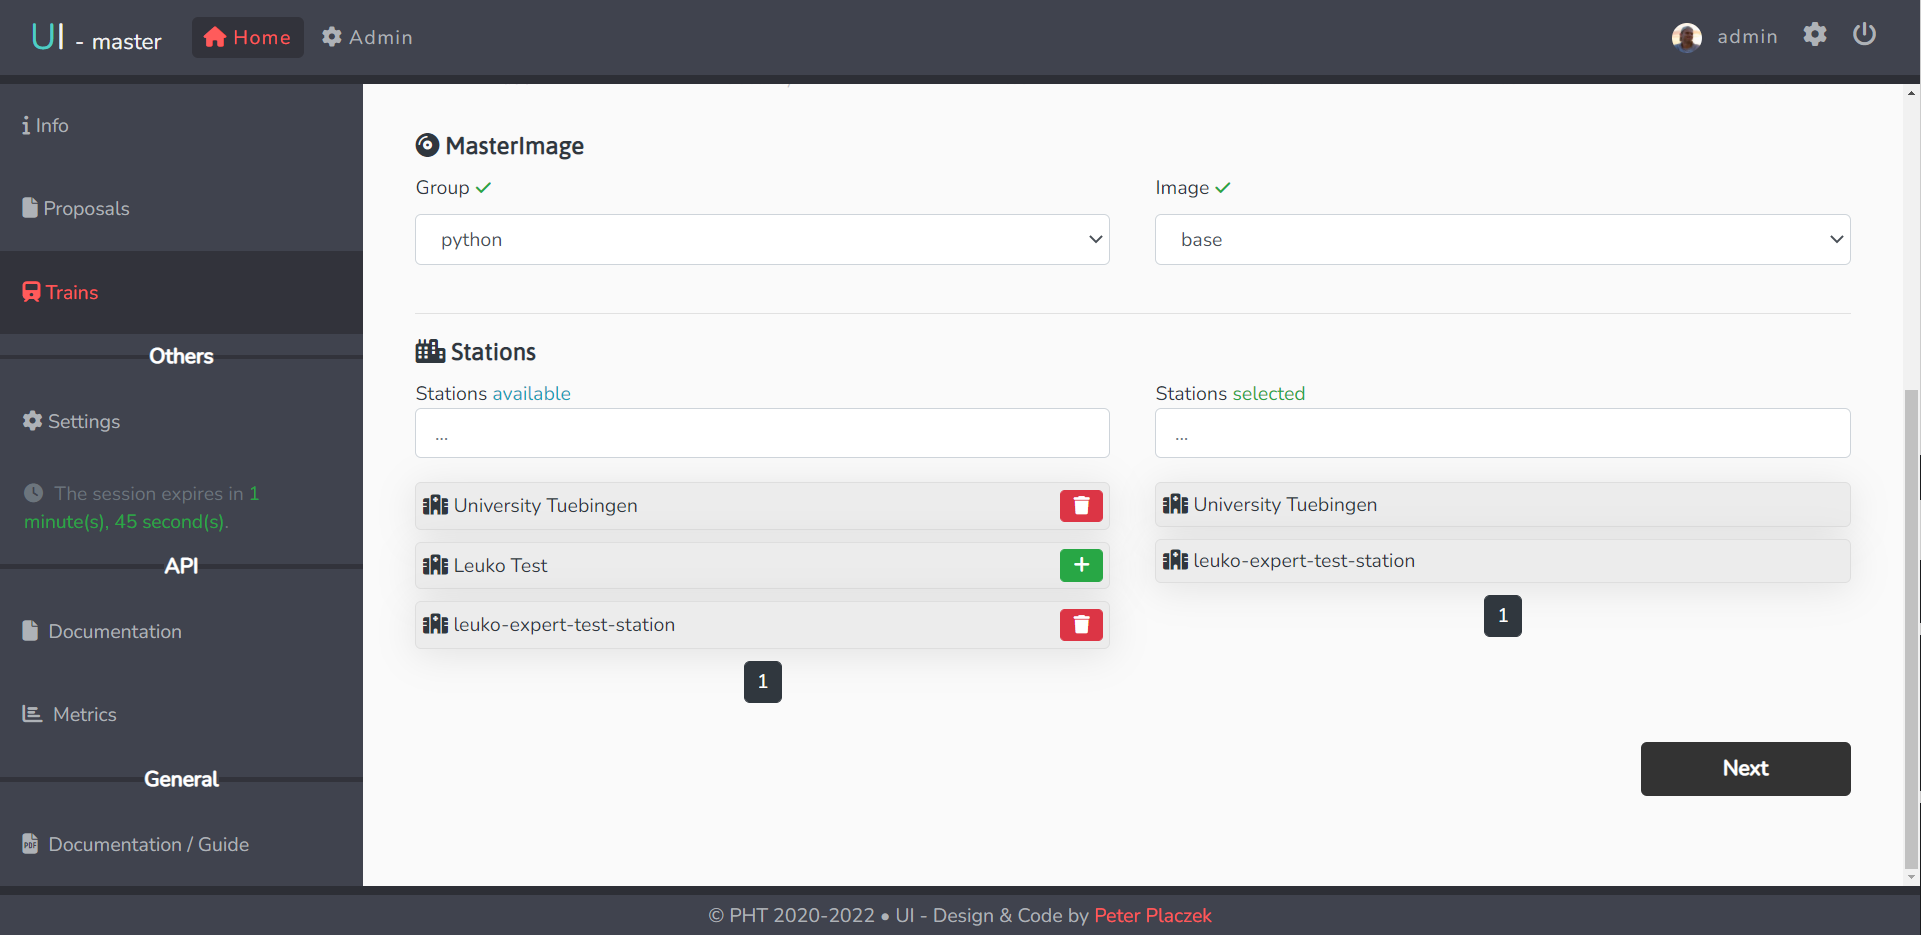
MasterImage & Stations
At this point the MasterImage settings are taking from the chosen proposal but can still be changed.
Additionally, you can select those stations you want the train to be sent to. The order you selected the stations will define the path the train will pursue.
Click on Next to continue.
Security
You need to select one of your registered RSA public keys for encrypting the train.
Additionally, you can add a Paillier-key to be used for homomorphic encryption.
Click on Next to continue.

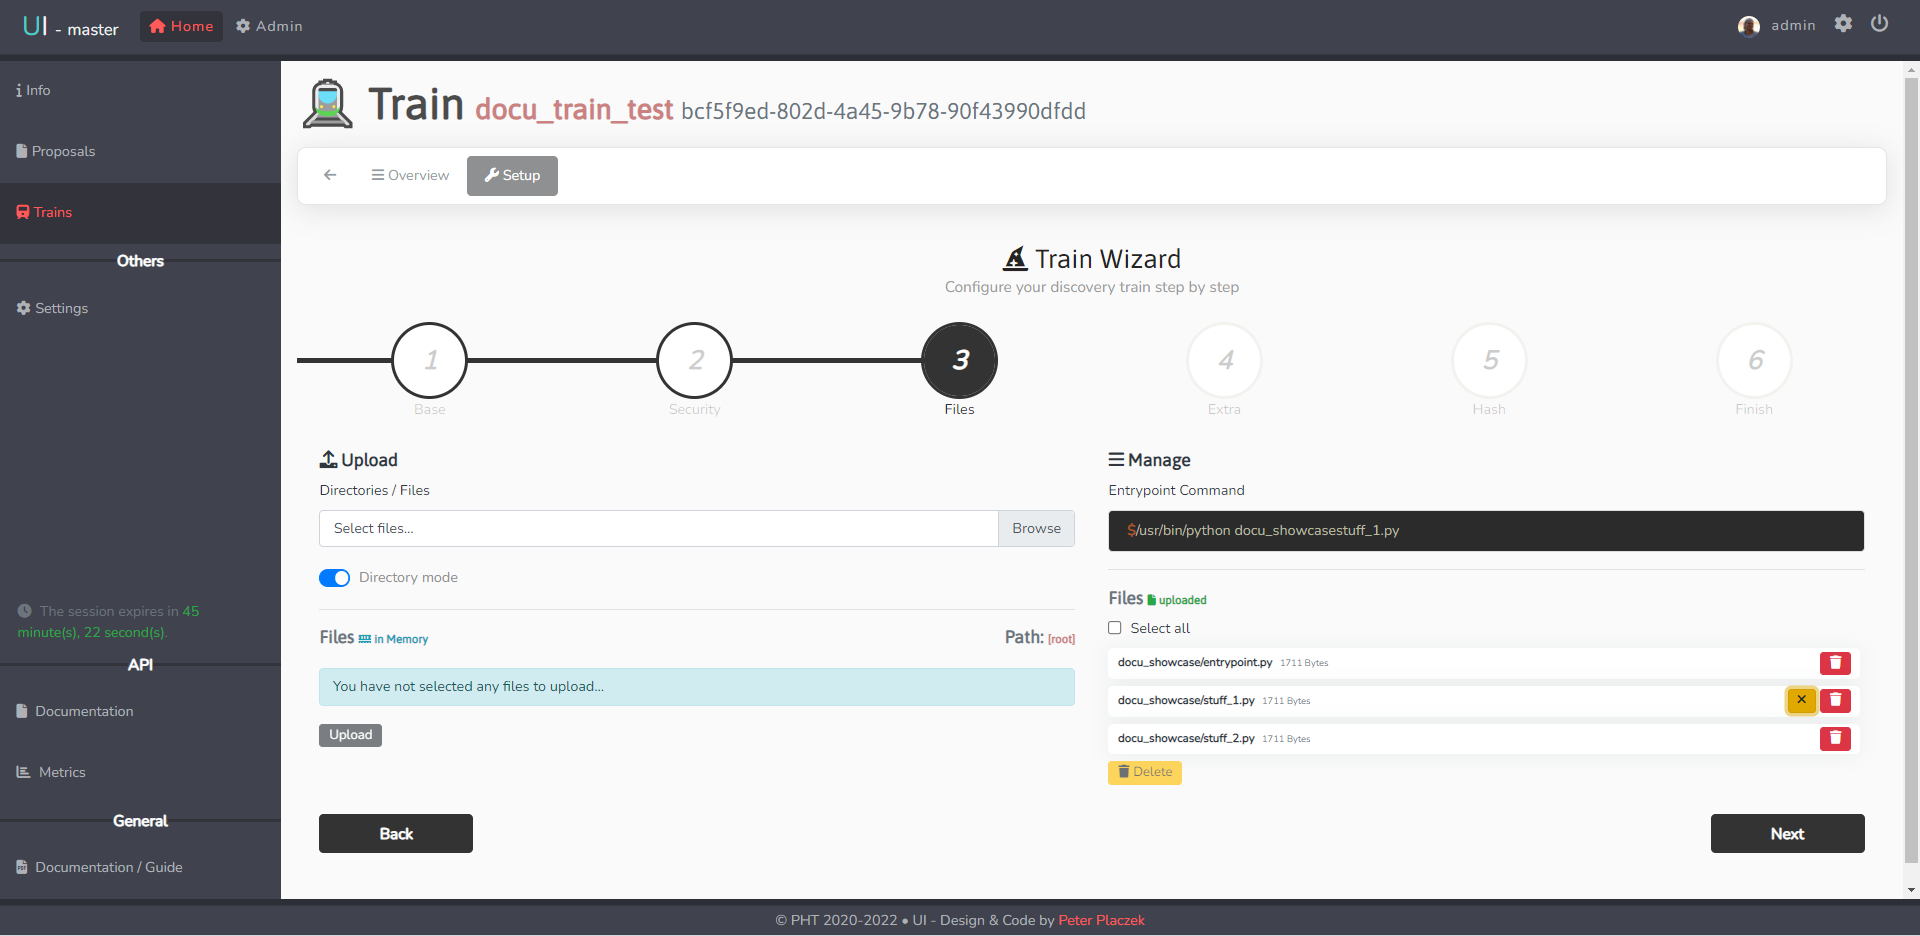
Files
In the file-section of the train submission you can upload the files containing your code, which the train will execute while visiting the different stations.
You can decide whether you want to upload only one single file or a whole directory of files. Depending on you decision you need to mark or unmark the Directory mode-switch.
After you have selected the file or directory via the browse-button you can find all the files listed below. Depending on the folder, you may not wish to upload each file, so it is possible to delete some files at this point.
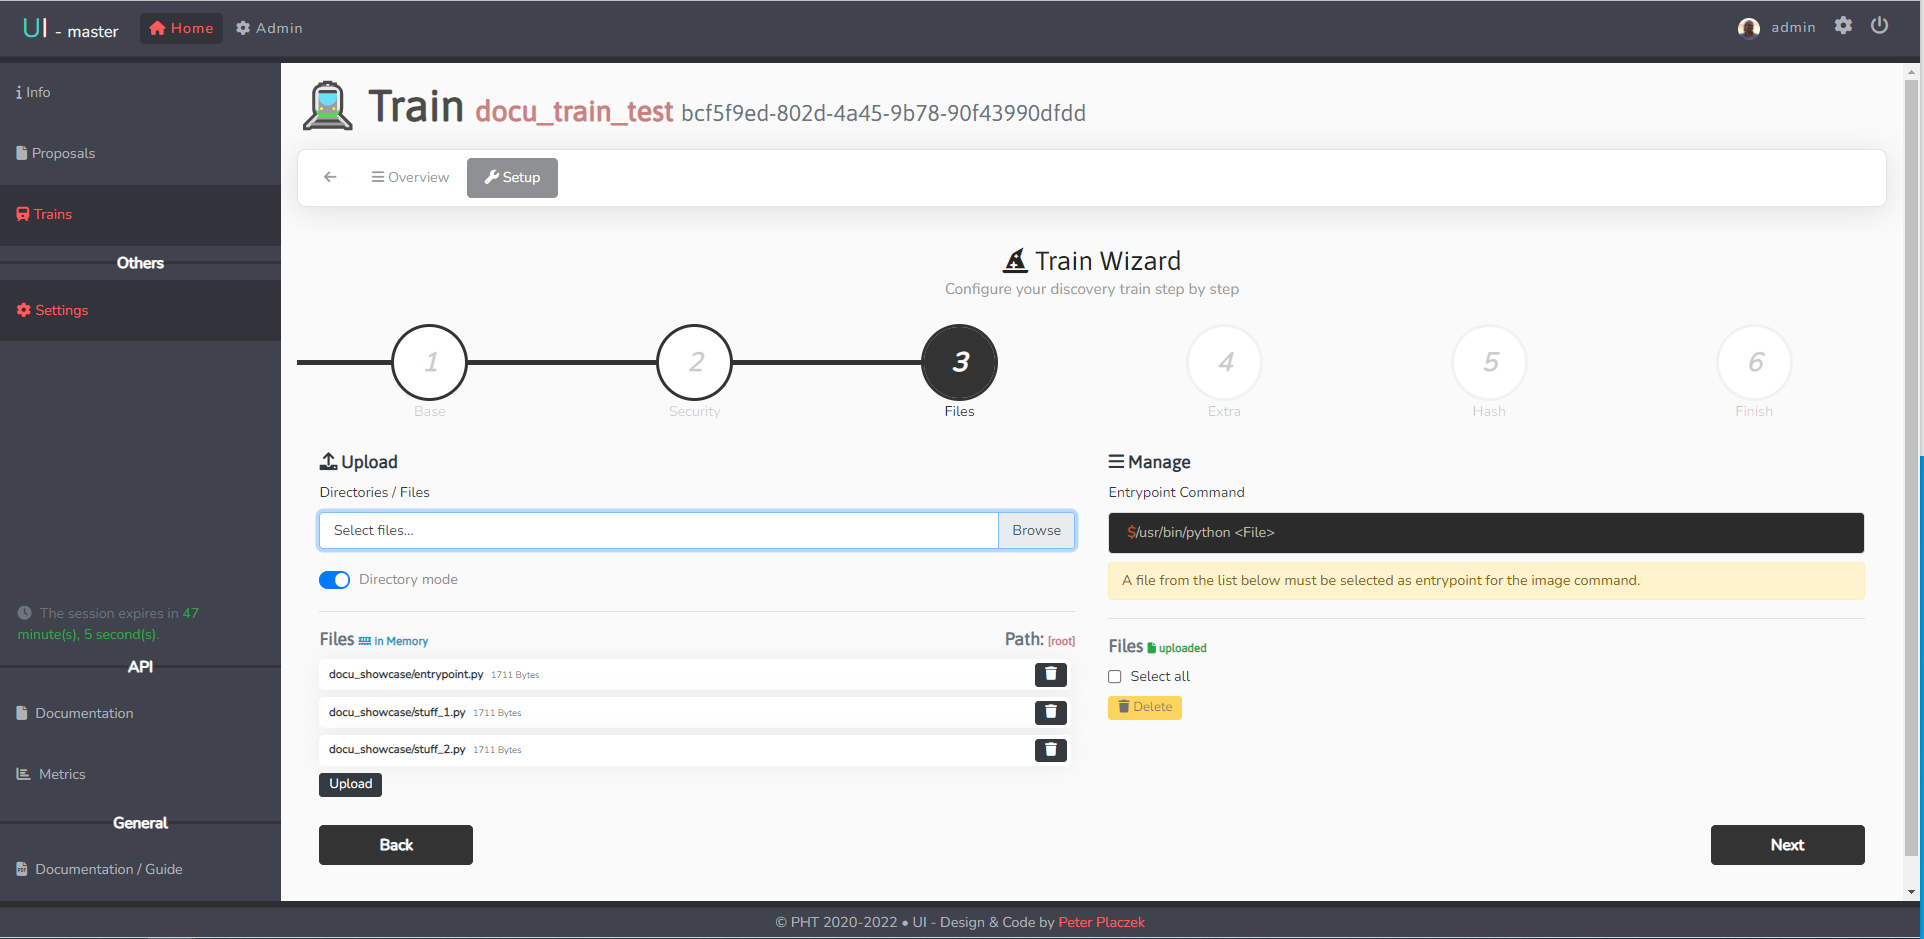
After uploading the files to the train you need to select one of the files as entrypoint. It is not name-depending as you can see in the picture below. You can select the specific file by clicking on the green-button. The chosen file will be displayed in the black textfield. We have chosen the stuff_1.py as entrypoint for showing you, that it is not necessary to name one of your files "entrypoint".
By clicking on the yellow X-button you deselect this file.
Additionally, you can delete some files as well at this point.
Click on Next to continue.
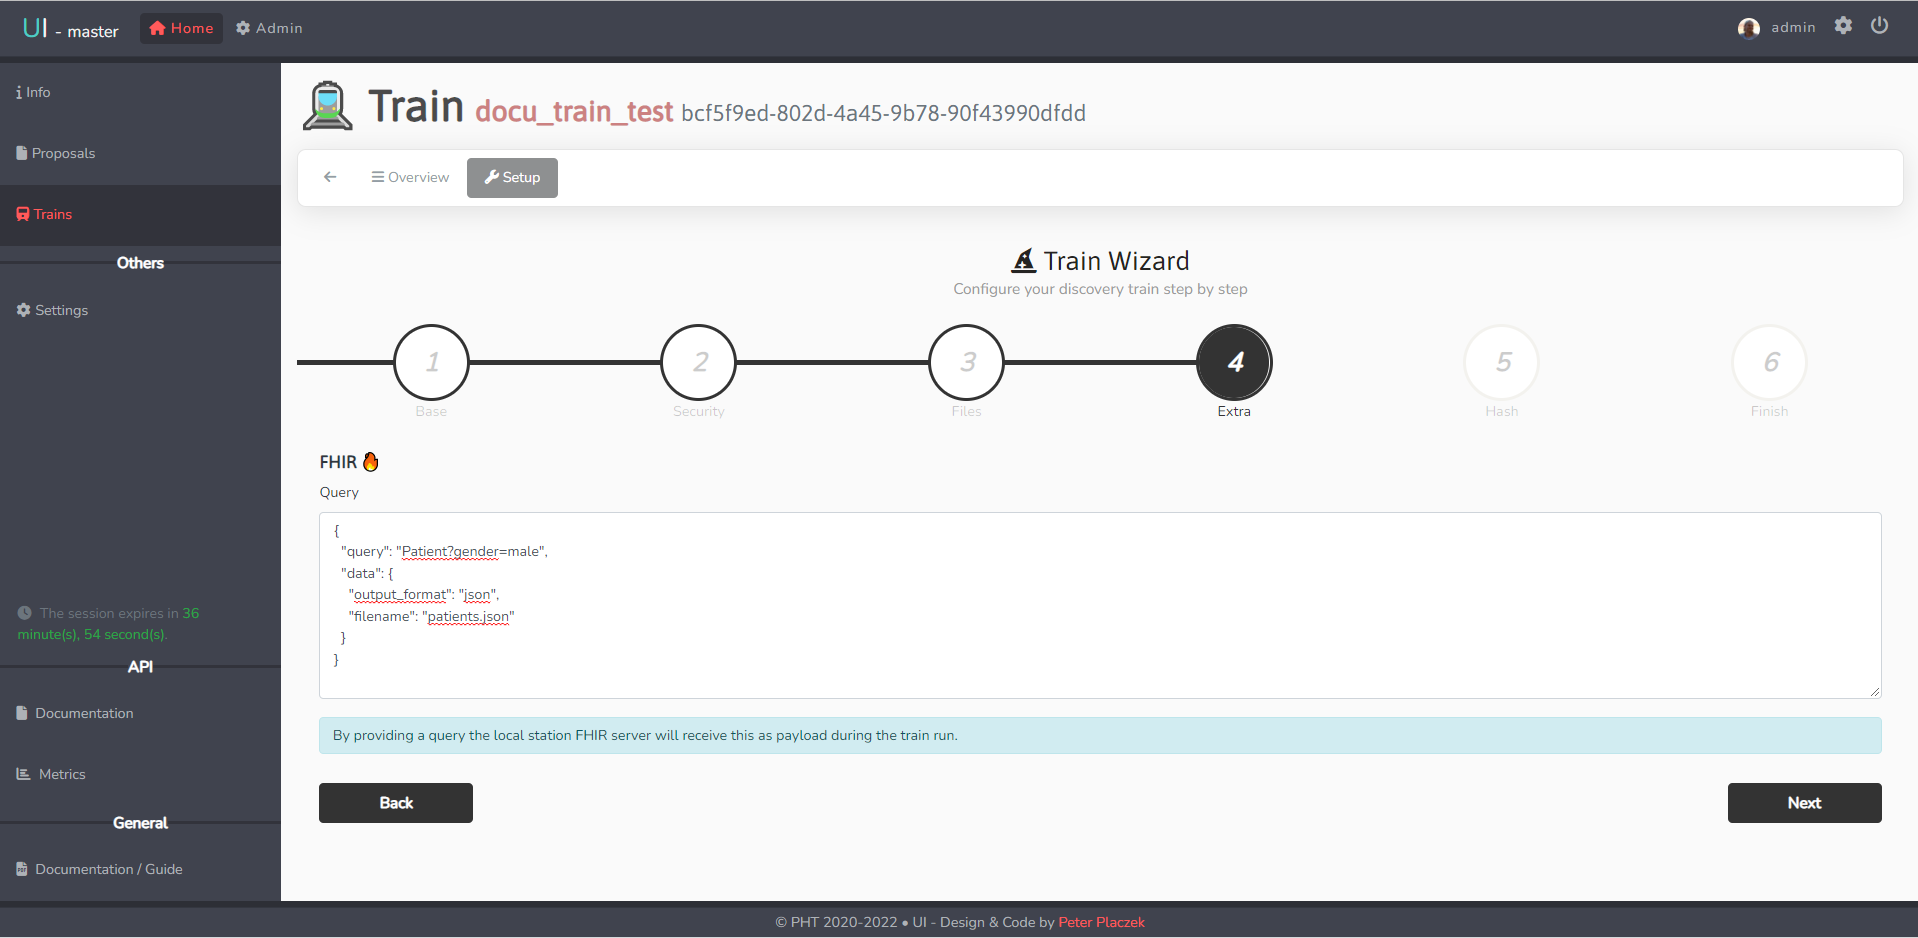
FHIR Query
In the Extra-section of the train submission you can add your valid FHIR Query to the train. It can be either the option with parameters or as URL version.
You can find more information about the query in this documentation under the section User Guide -> FHIR Query
Here we used an example query from the FHIR Query documentation.
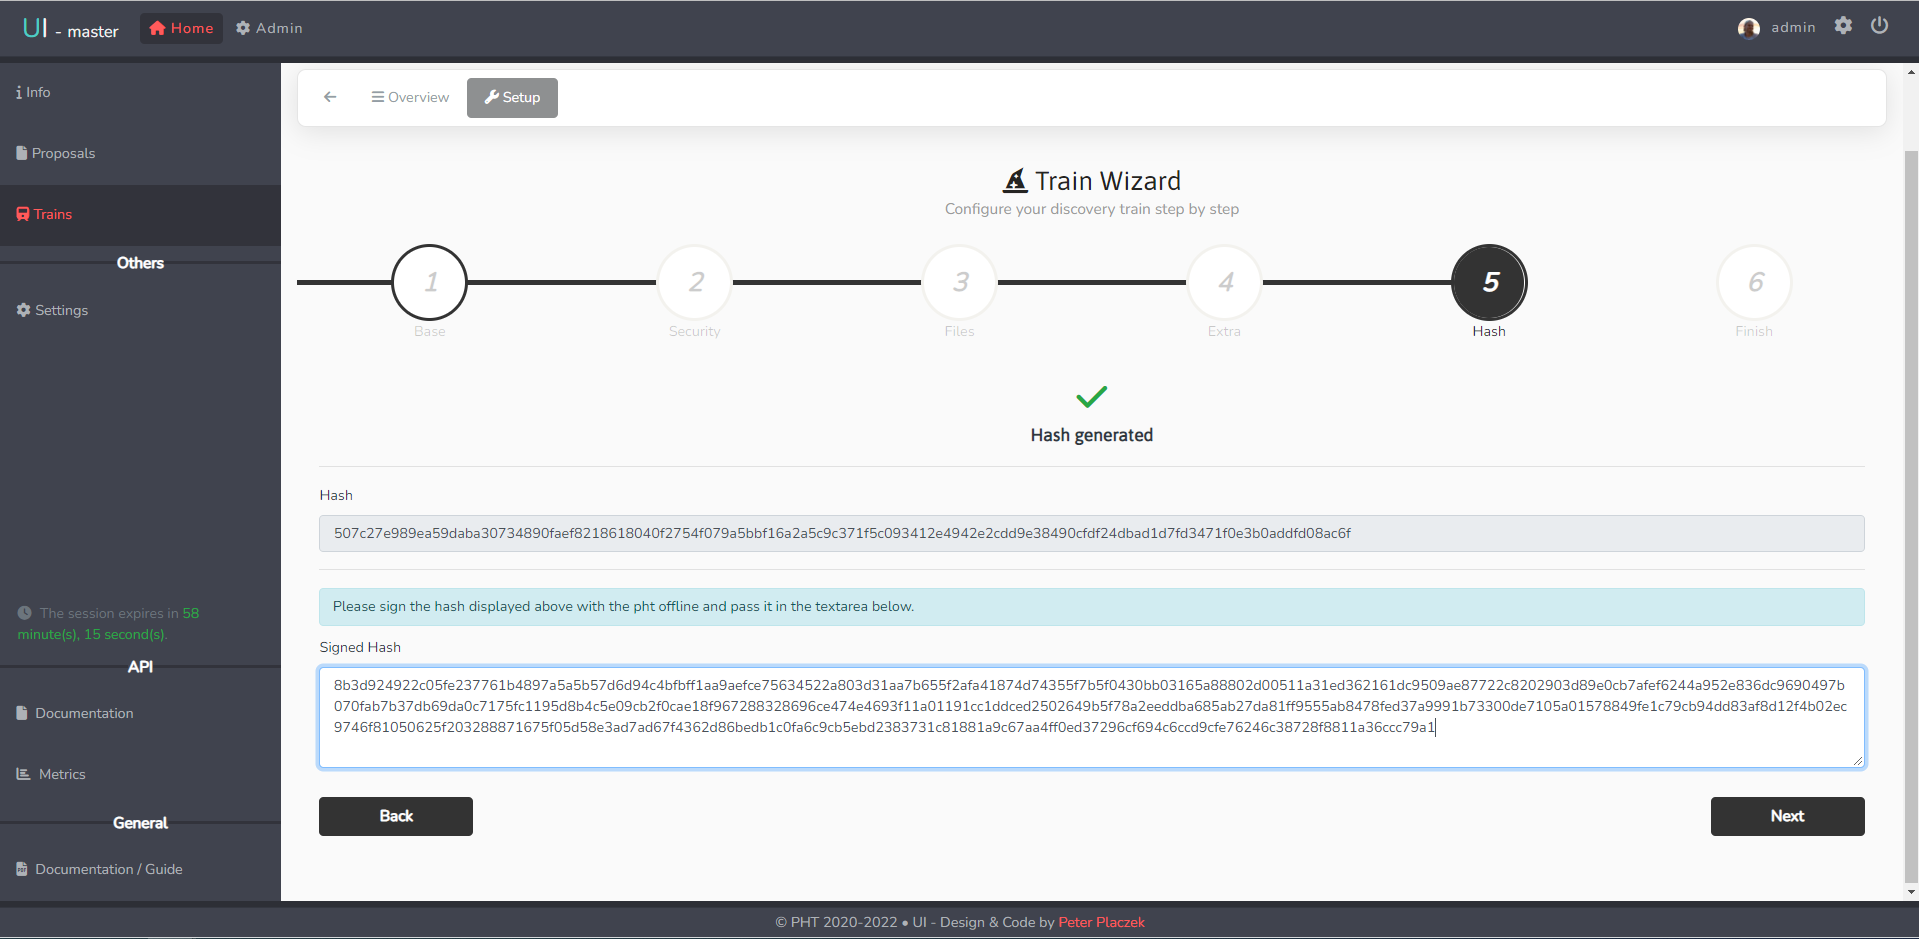
Hash & Signature
One of the last steps is to create a hash of the train started by this station. For this, you need to generate the hash value. (This could take some time)
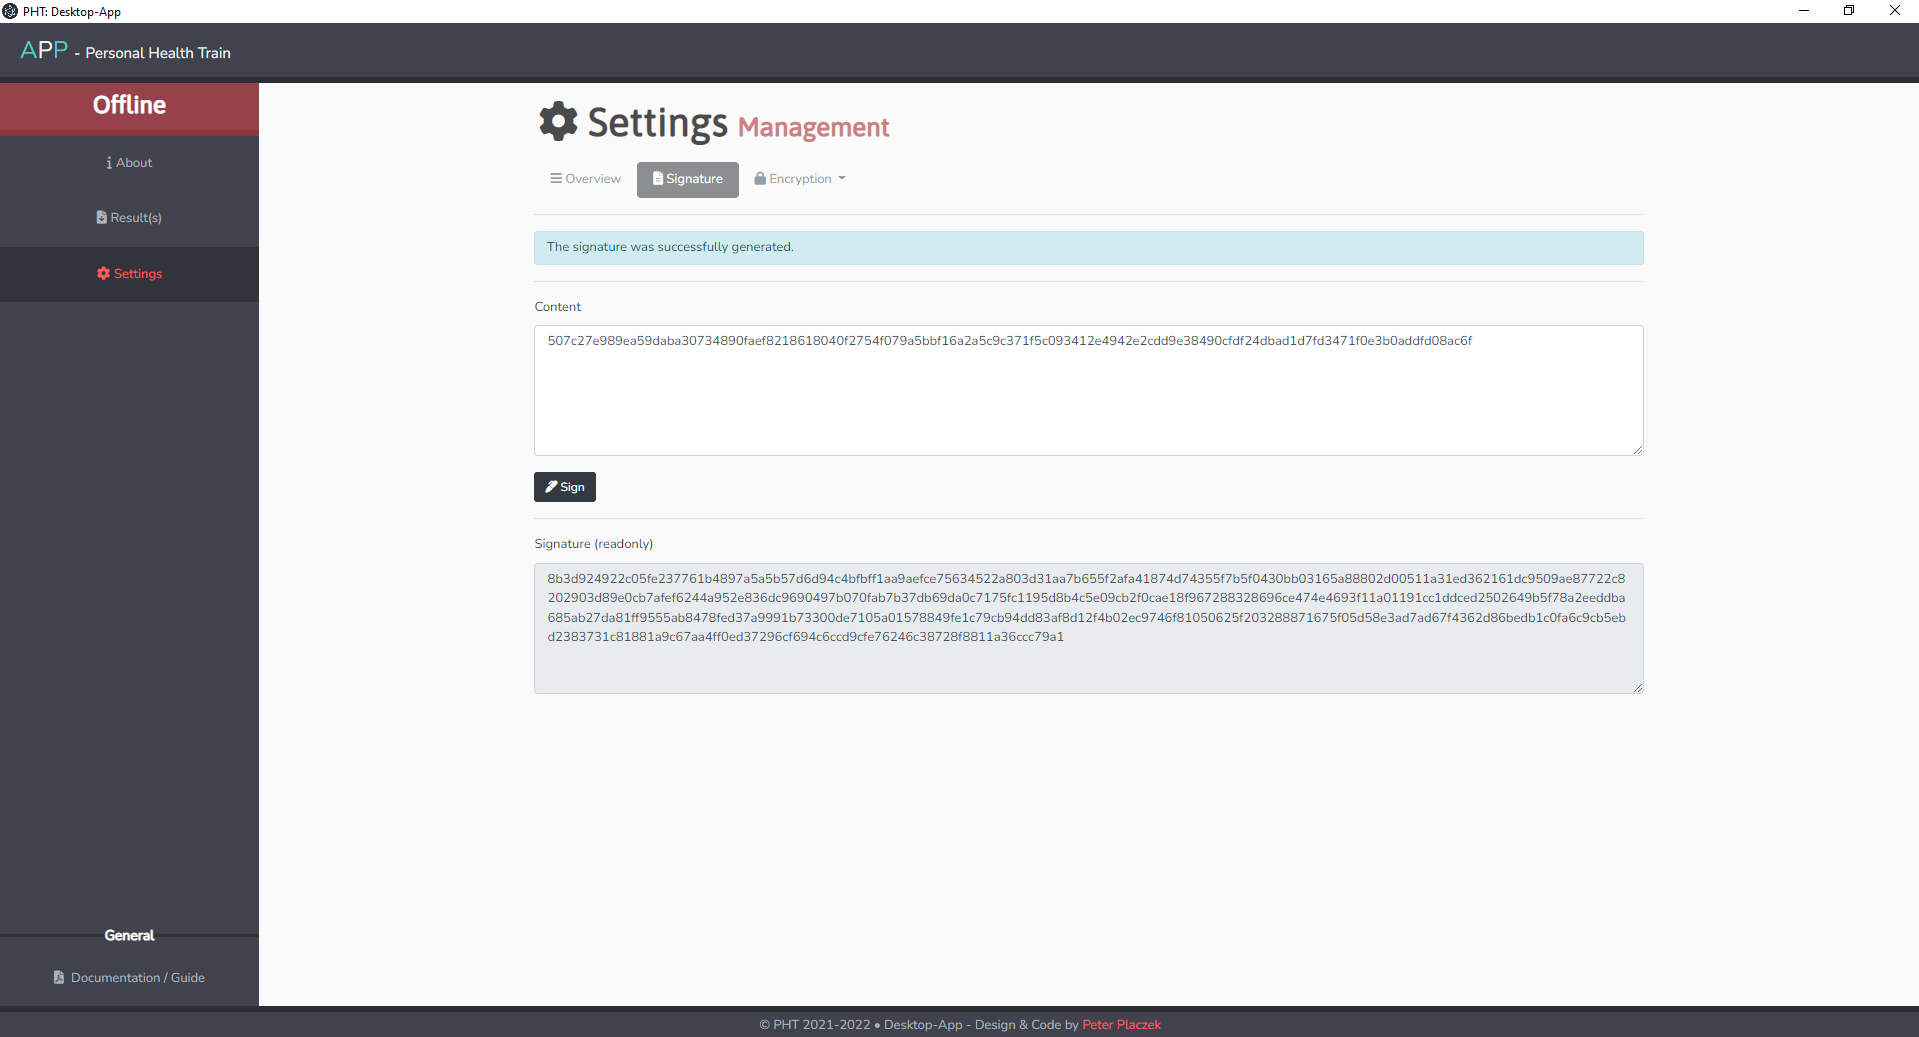
After the hash value was generated, copy the HashKey and perform the signature with your private key.
The application must know your keypair (private and public key) to perform the signature on a hash value. (See Create Keys when you have restarted the Desktop APP).
- In the Menu, click on Signature.
- In the Hash text field, you should paste the generated HashKey
- Click on Sign.
- Copy the signed hash from the Signature (read-only) text field and proceed
The signature from the Desktop APP now needs to be pasted into the text field Signed Hash.
Click on Next to finish the configuration step.
Approval
Before the train can be built and run, it must be approved by the stations you selected at the beginning of the train setup process. See the Admin Guide for details on how this process will be handled by the admin.
Execution
At this point, the train is ready to be led loose on the track.
You can start the train by firstly build the whole train together (by clicking on the green start-button next to Build).
After a successful build train you can Run the train, which starts visiting the stations and perform your code.
Each station needs to start the code manually via the Airflow-Control of the station. You can find more information here: Station
After running through all station, you can click on the Download-button on point 4.Result. To decrypt the results, the Desktop App is required.
Result
Download
After running through all station, you can click on the Download-button on point 4.Result. This will start the download of a tar file. The name of the file is your train ID. 
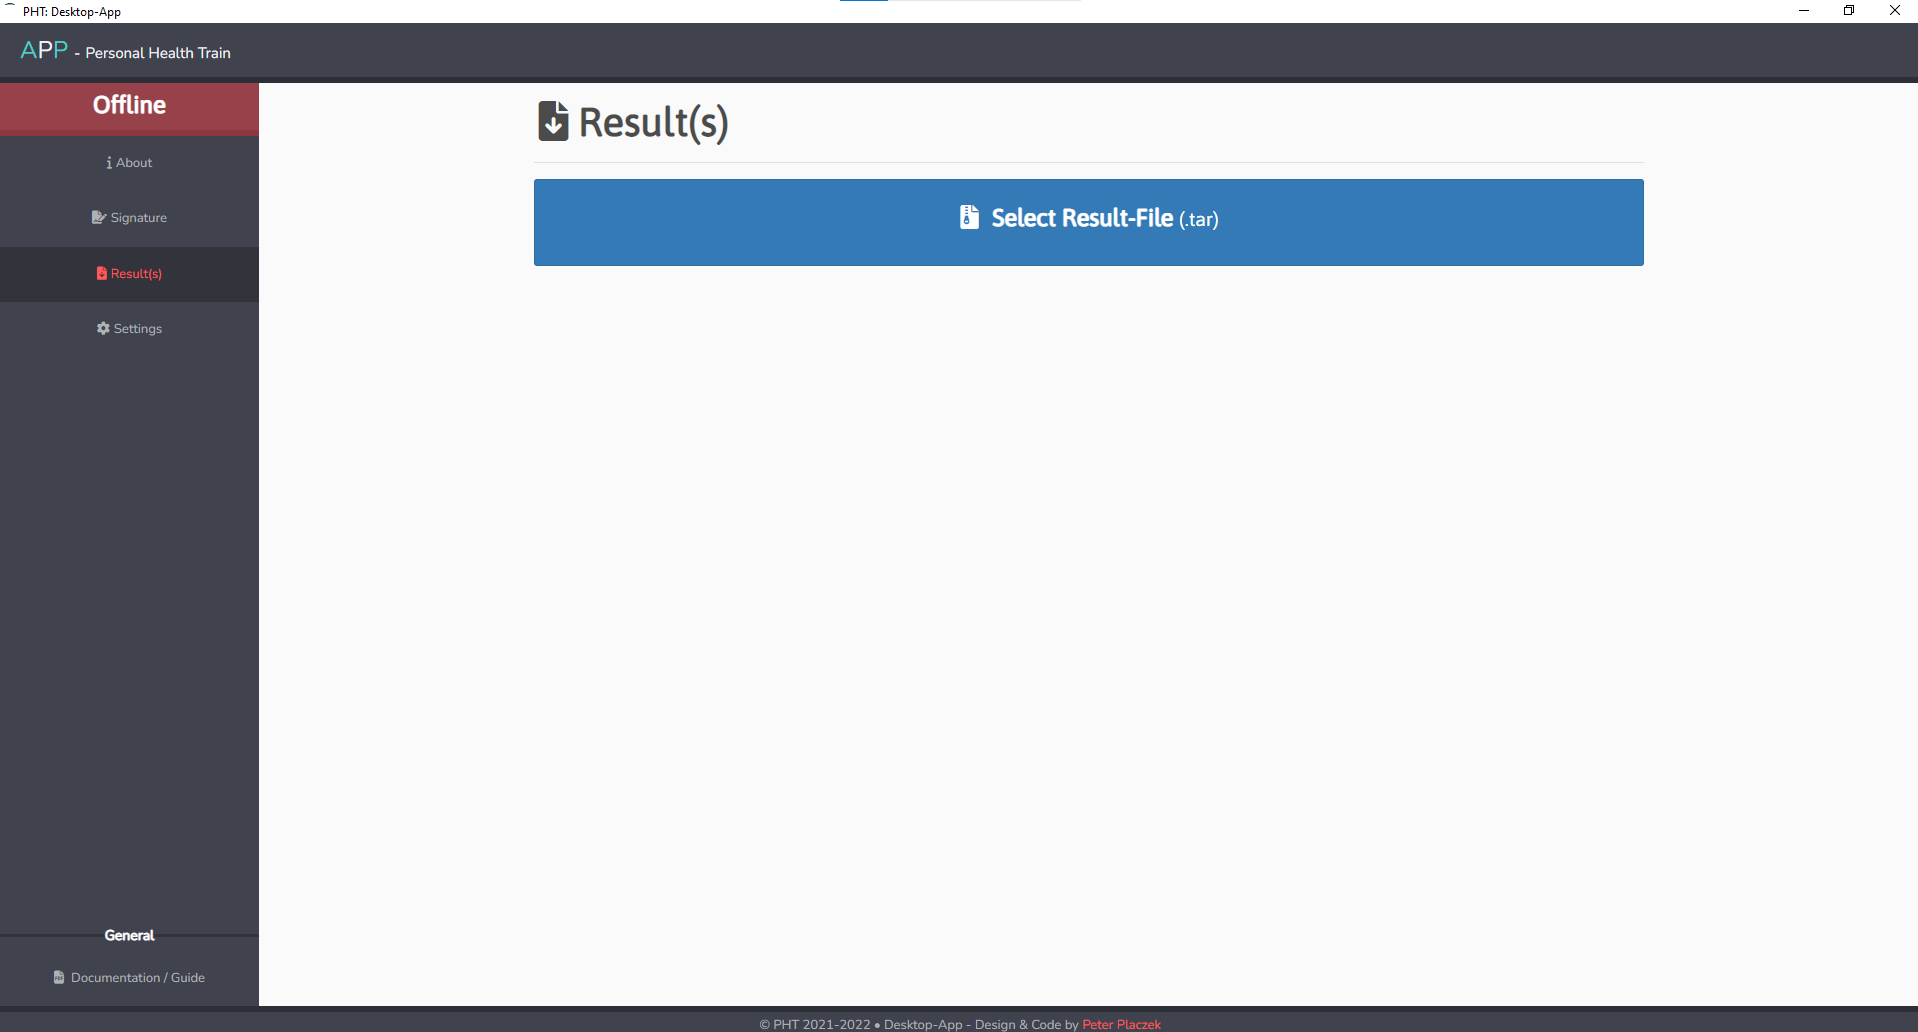
Decrypt
The results file is encrypted with the public key you selected during setup. In order for the Desktop APP to decrypt the results, it is necessary to load the same key pair that you used to set up the train.
Load the RSA key pair, see Setup -> Load keys
Click on results on the menu.
You will be directed to an overview where you can click on Select Result-File(.tar) button. Chose the downloaded results-file from the UI and press load.
A new view appears where you can chose which files you want to save.
By clicking on the x-buttons, you can delete those files from the working space (you do not delete them from the results_file.tar, only a deletion from the Desktop App!).
By clicking on the save-button you start downloading the remaining files. A new folder will be placed in the same folder where you have selected the result-File.tar.